Zip Tie Side Chair Prototypes
I have been looking into zip ties for furniture construction for a few years now. The Zip Tie Lounge Chair went up for download a year and a half ago. I was pretty pleased with it at the time -- I had tested an unproven notion and it worked! -- but it's really just a first iteration. It has worked out ok, but it hasn't fully solved the design problems. There are a couple of outstanding issues:
+ Over time, it has become apparent that zip ties aren't great for rigidly connecting plates at right angles. A zip tie naturally forms into a slightly-teardropped loop as you pull it tight, so they never fully draw when wrapped around a right-angled butt joint. Then the plates flex every time someone sits in it, and the friction gradually loosens the chair and makes the ties snap.
+ The ergonomics were pretty good, but the lumbar wasn't just right. It was low to get into and out of, and the arms flexed when you pushed on them to get out of the seat. The low center of gravity really put a lot of pressure on the ties connecting the seat plate, which was the usual point of failure. Cushions are really improve the comfort, which took away somewhat from the intended simplicity of a pure plywood chair.
+ To make it wide enough, and the seat big enough, it took a whole 4' x 4' sheet with a lot of waste.
Instead of working out another iteration of the lounge chair, I decided to tackle some of the problems in a side chair. It would be smaller, lighter, use less pieces, and it would be easier to dial in the ergonomics.

My first sketch of the Zip Tie Side Chair.
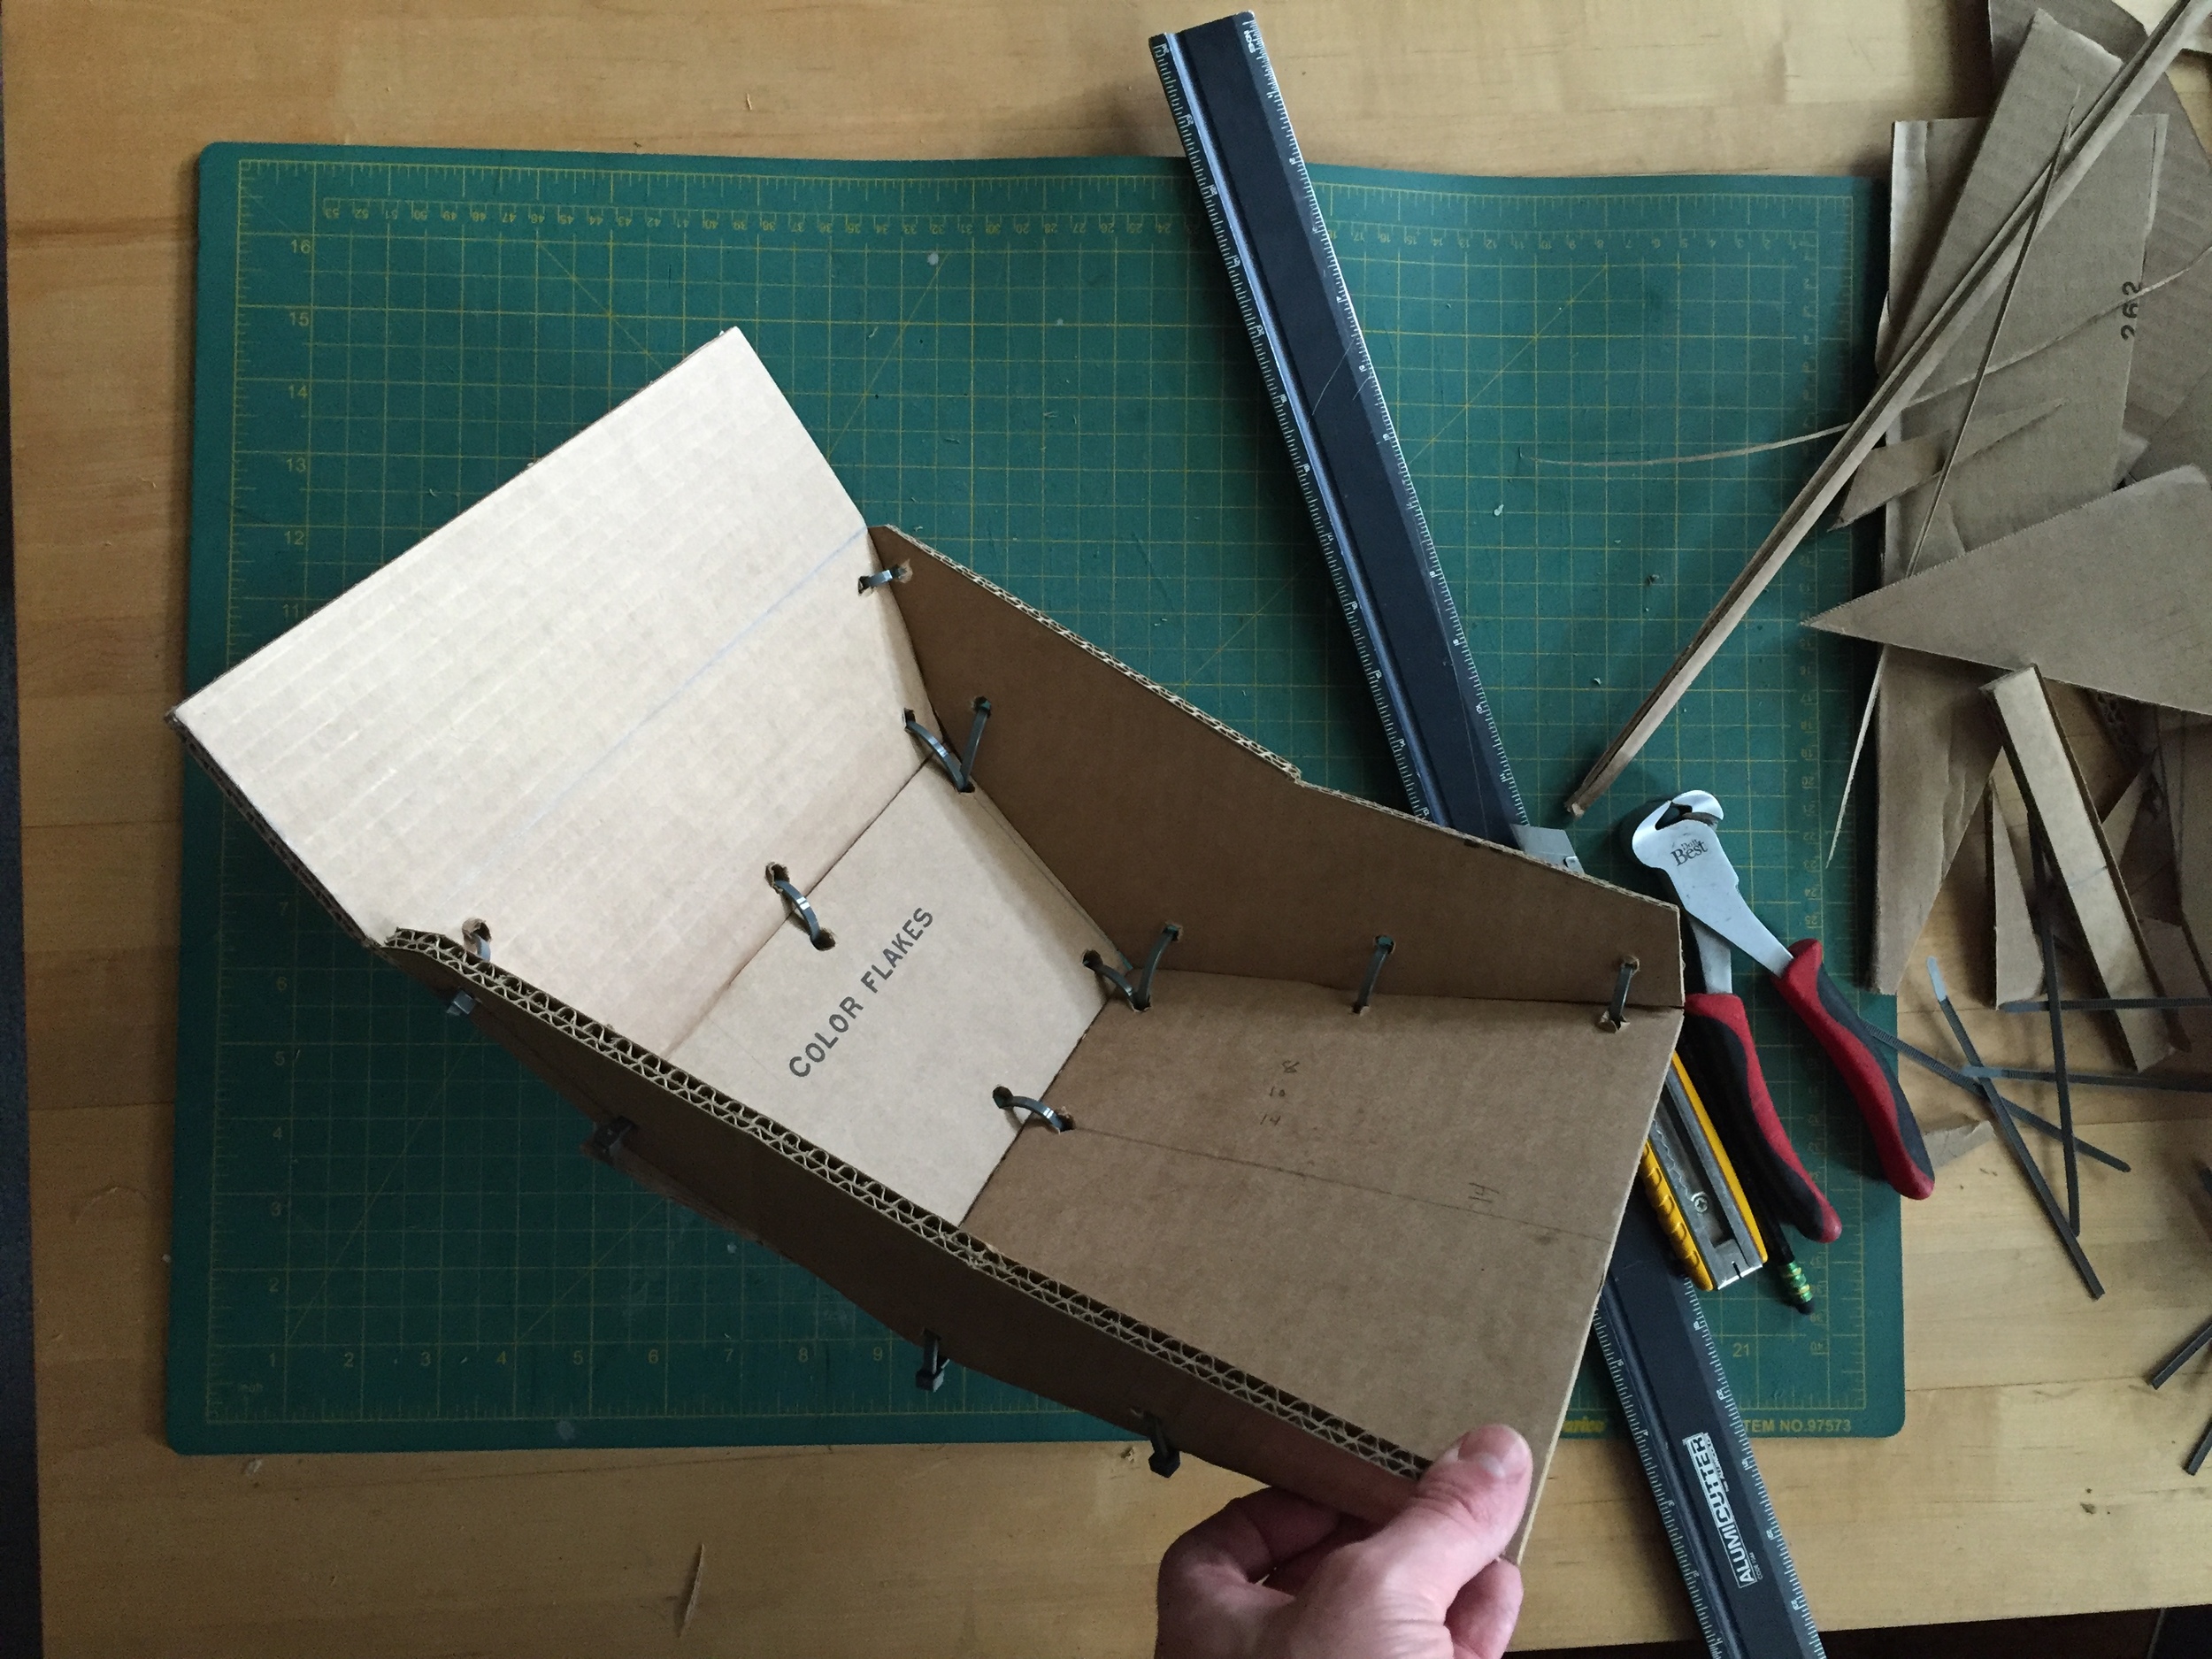
I had an idea that I could make a rigid "shell" from four panels: a seat and a back that were both rectangles with clipped corners, connected with irregular trapezoids. If the back plate was slightly narrower than the seat plate, the trapezoidal plates would be forced to rotate outwards, beginning to kind of "curve" the form. This would be both an ergonomic and structural move: if the connecting trapezoids are at right angles to the seat and back plates, the shell has no lateral stability.
Figuring out the back and seat panels was easy; the trapezoids were a little tougher. I got the basic idea from my Sketchup model, but had to physically prototype a few times in cardboard to dial in a shape that worked. It also presented an assembly problem, as there is no clear orientation to the trapezoid piece. The first time I put it together, I did so backwards, and the shell was strangely elongated and low. When I make the CNC version, I will vary the number of zip ties at panel joints so the assembly orientation is obvious.
To make the base more rigid than in the lounge chair I pursued several strategies. First, the base slots into the seat, which then works as a shear plate to keep all base members aligned. Second, the base tapers from front to back. Pulling the corners out of square conforms the corner joints to a little bit more round angle, helping the zip ties draw tight. Third, I hoped to sort of box-joint the corners of the base so the plates interlocked, but that'll have to wait for the CNC-ed version.
I started with scale models.
Then 1:1 models.
At the same time I was experimenting with some new structural ideas in the chair itself, I was looking into new ways of documenting my work. In the past, I've relied on plentiful photos taken as I work -- first with a digital camera, then a phone, and now with a new phone that has enough memory for video. I bought a little magnetic tripod for my phone, a couple of video apps, and dusted off that old copy of iMovie hidden deep in my hard drive.
The learning curve has been steep, but luckily have had some great YouTube channels to look to for inspiration and techniques. Jimmy DiResta, Frank Howarth, I Like to Make Stuff, and Make Something are staples, along with Core77's weekly maker video roundup. I've put together two videos so far, and I've learned a lot with each one. Lighting is the hardest thing, followed by the limitations of some of the apps I use. Sound, music, or effects is also super-limited right now.
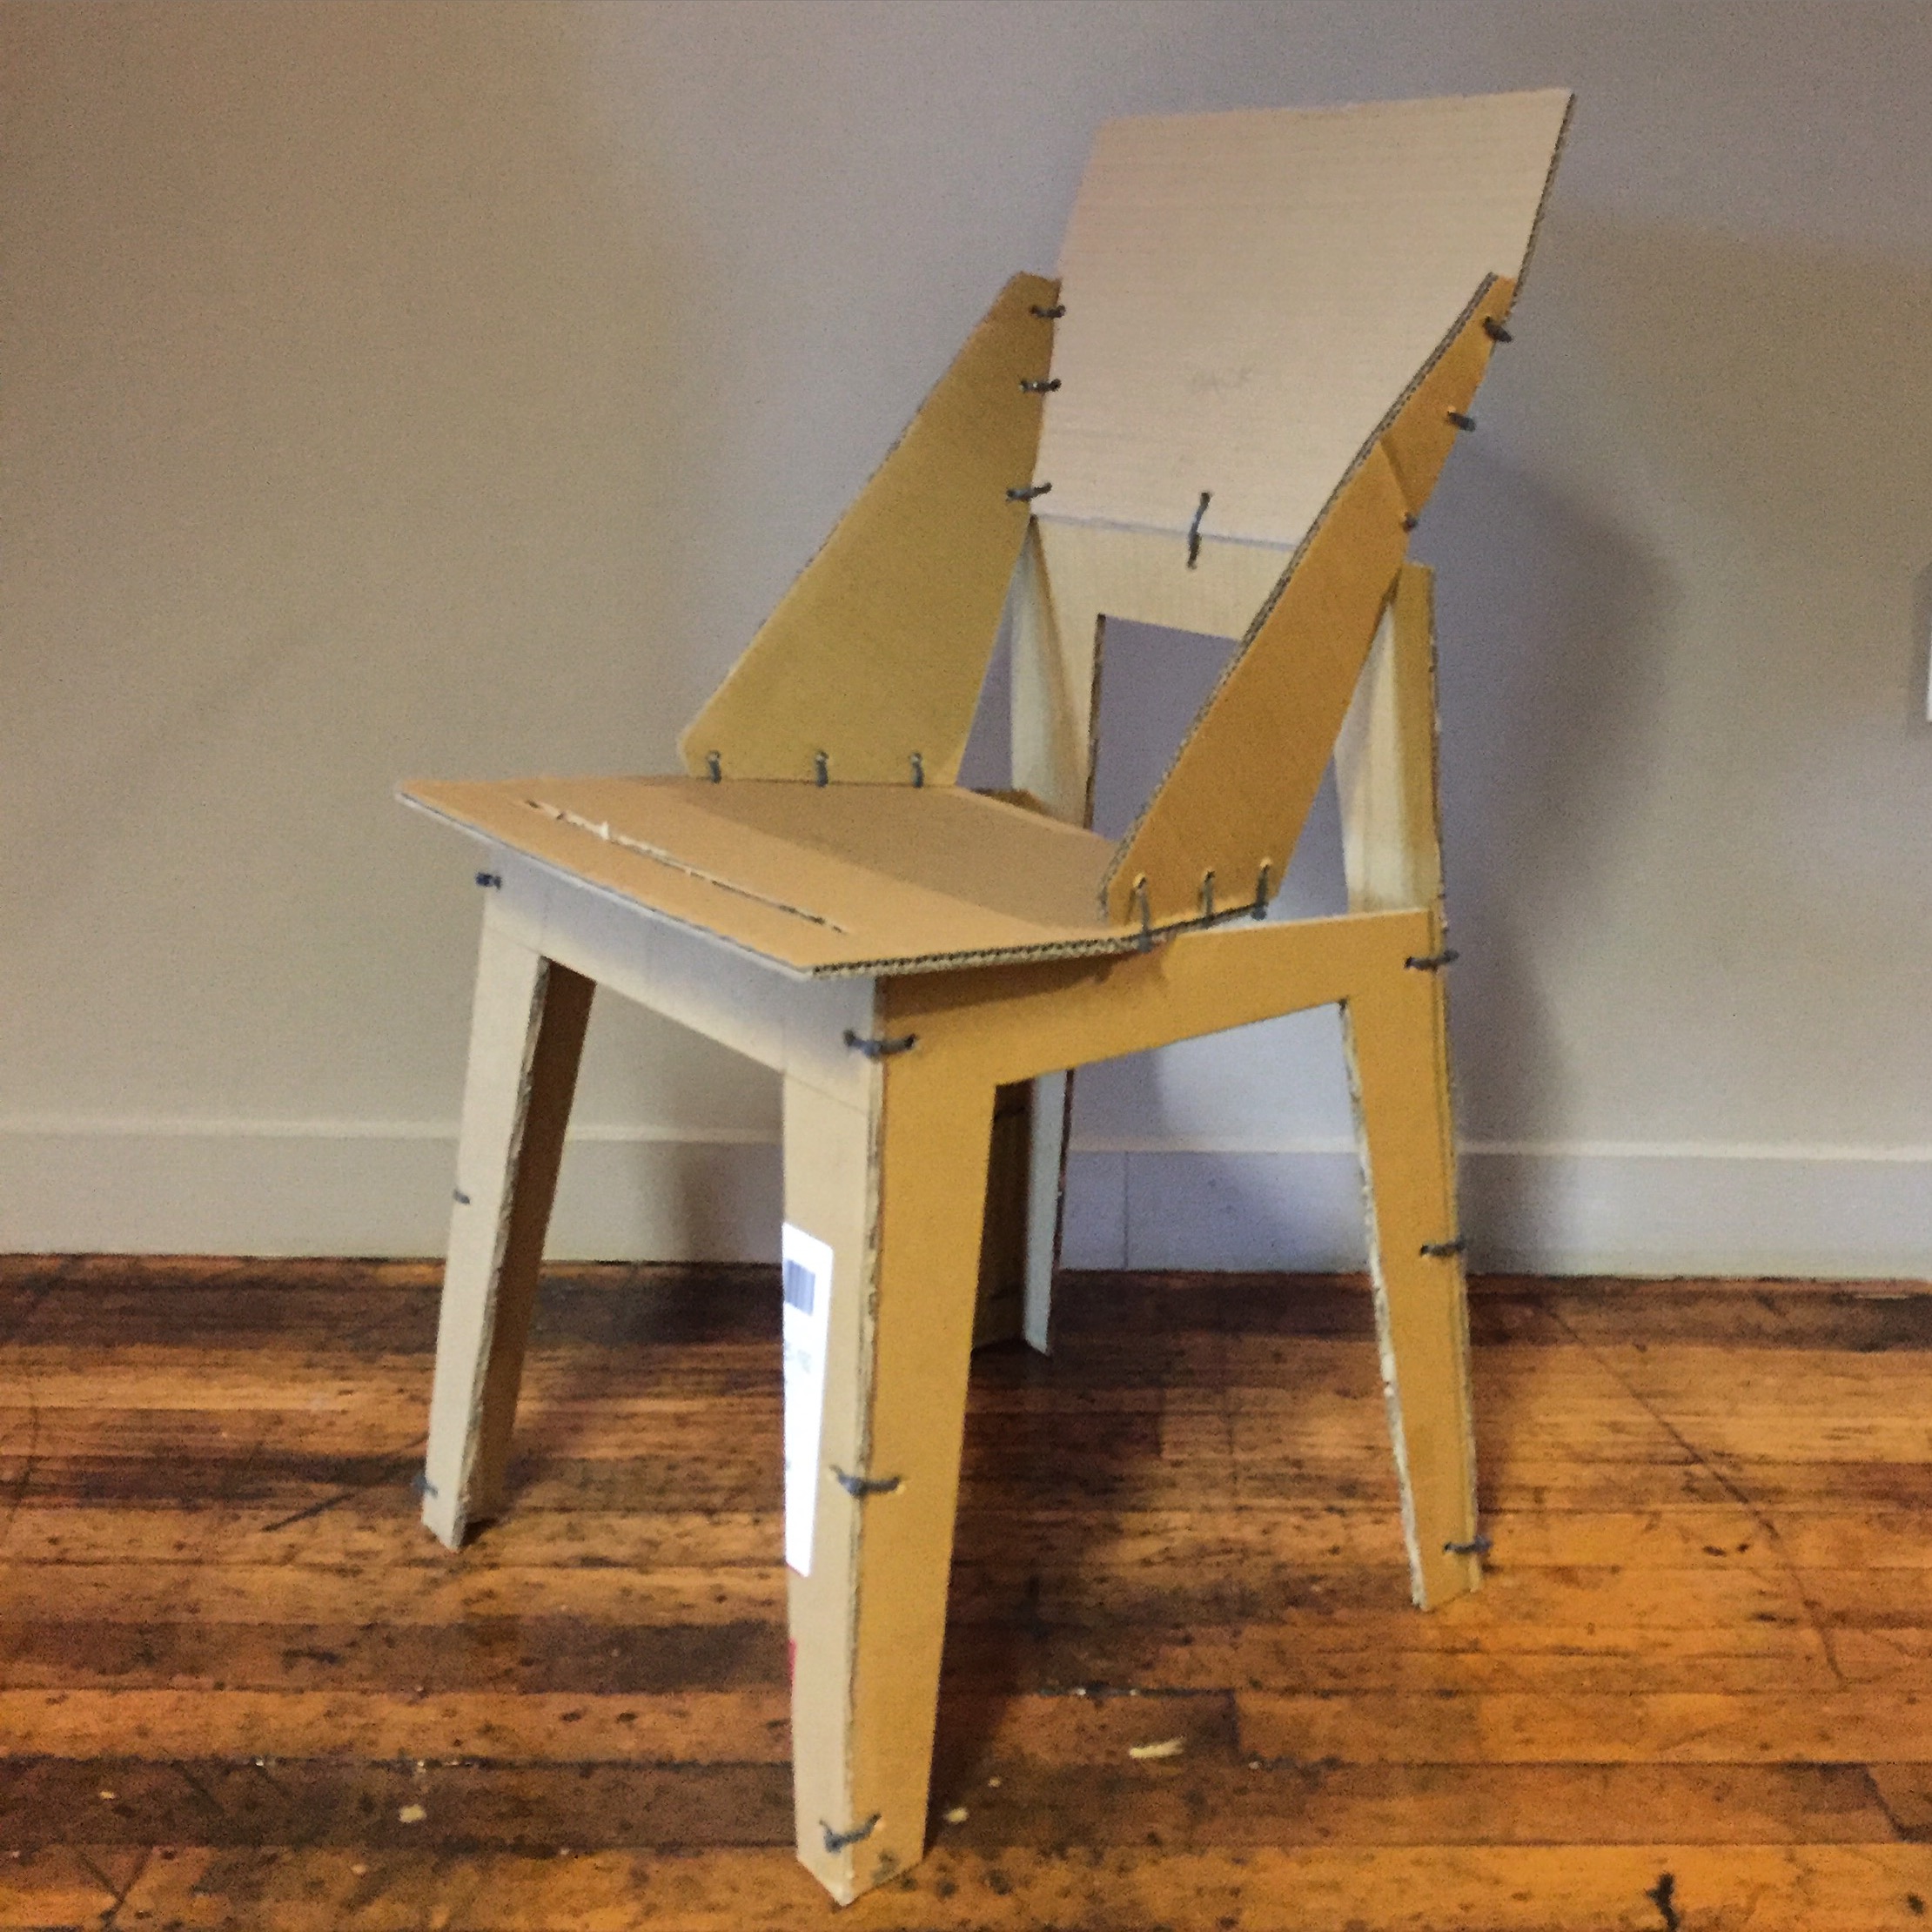
The cardboard versions looked great, but I had to get a prototype that was sturdy enough to sit in. I took an afternoon in my sister's garage (luckily it's been a warm winter), and made a rough prototype in construction-grade plywood with a circular saw. To articulate the form a little better (and save money), I made the seat shell out of 1/2" plywood and the base out of 3/4" plywood. It came together pretty much how I thought it would, except for a 3/4" gap between the back panel and the top of the back seat piece. I think that came down to a mistranslation between paper-thin material and plywood, which has thickness.
The prototype came out pretty well. It's certainly rough around the edges, but my theories about increasing the sturdiness seemed to be proved correct. It's also quite comfortable -- I think the seat angles and height are pretty close to ideal, and the trapezoid panels don't dig into the back since they are turned outwards.
The next step is to draft up a version in CAD and CNC it, which will allow me to test some more structural notions and refine the repeatability. And I'll be sure to film the whole thing . . .